As noted in my last article I offered to build and paint Dave
Forster's Konquest base in a similar way to my own and I thought I'd write an
article on how I build mine and paint stages should any reader be interested!
 |
| Slate glued down |
Materials:
Simple really, ordinary garden slate which is generally a
blue/purpleish colour. Very cheap and
abundant; I smash the larger bits up with a hammer to get more manageable
pieces. For the earth I use medium grade
model railway ballast; something I've recently started using, but find that it
'clumps' nicely and has a nice texture for drybrushing.
Assembly:
 |
| Ballast & PVA mix |
Once the slate has been bashed up into manageable chunks I
tend to dry-fit pieces with the legs looking for an interesting fit, for
example the Conquest has a bent right foot which will fit with some angled
slate, whereas the flat left foot would need to be modelled on some flat slate
otherwise the model would end up off balance and look wrong. In Dave's base the right foot would be
mounted on some angled slate, which was actually quite thick, so therefore the
left foot would need to be raised with the thickness of the earth, around 5mm.
 |
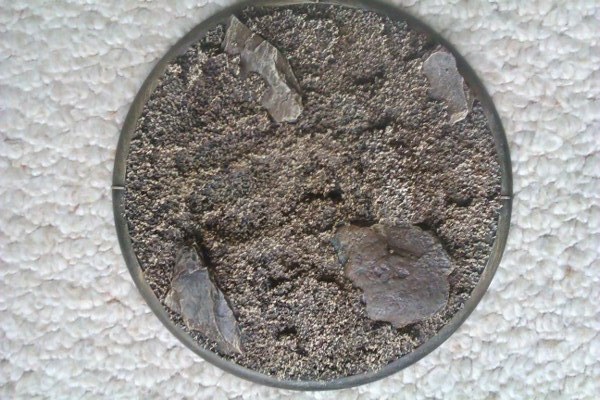
| Ballast mix applied to base |
Once the foot positions were figured out I glued the slate in
position with thick superglue, thick adds a greater contact and acts as a
filler too. The next step is worth
taking time over to save problems later.
I use a pencil to mark the final foot positions and make ready to site
the pins, with the Colossals this is quite important as they have
pre-determined LOS markings on the base itself.
 |
| Close up once dried (note pins for feet) |
To get accurate pin positions I first drilled the Colossal's
feet in places suitable for the pins, i.e. where sufficient depth could be
achieved as well as hidden when complete.
The next step was to cut pins that are deliberately too short, just
enough to poke out of the holes; these were left in the feet and the model
sited on to the pencil positions drawn earlier.
Next the feet were pushed firmly allowing the too short pin to make an
indent on the plastic or slate where the other hole needed to be drilled. This should make an almost exact fit for the
pin to line up...
Drilling through slate is possible and certainly worth it, it
just takes time and patience! Once the
holes were drilled I inserted much longer pins than the previous ones and bent
the ends into an L shape in order to secure them on the base, for the feet to
slip into later. After a quick dry-fit
the pins should be correctly aligned, possibly a slight tweak with some pliers
to bend them, but hopefully a good fit has been achieved.
Once the slate has been glued into position with superglue
the next step is to fill the gaps with earth, basically mix the ballast with
PVA glue and some water into a very thick paste. I used a sculpting tool to lay the mixture
down and sculpt it into an undulating earth that would look good when
painted. One final thing was that I
fitted the legs into position as the earth mixture was drying in order to make
the left foot fit snugly; the earth was pushed slightly to leave a footprint
and the legs then removed and cleaned up after any excess got stuck. All done and just ready to dry now!
Painting:
The paint scheme for the base is quite simple, basically
drybrushing the following colours in order:
1.Chaos Black primer undercoat
2.
Scorched Brown drybrush
3. Bestiel Brown drybrush
4. Snakebite Leather drybrush
5. Menoth White Base drybrush (initially don't
clean the brush, but leave some of the previous colour (Snakebite Leather) to
get a halfway tone. Then do a pure
Menoth White Base drybrush
6. Skull White drybrush (very light)
7. The slate rocks were basecoated in Bastion Grey
8. Slate washed with Badab Black
9. Slate re-highlighted with a drybrushing of Trollblood Highlight and very light Skull White
 |
| 2 |
 |
| 3 |
 |
| 4 |
 |
| 5 |
 |
| 6 |
 |
| 7 |
 |
| 8 |
 |
| 9 |

nice one - great walkthrough - I will definitely be getting myself some railway ballast.
ReplyDelete