Friday 28 October 2011

Choir of Menoth

Work has progressed apace since I completed the Vassal the other day.  Myself, Luke, Andy and Mark are about ready for Golden Troll tomorrow, I've played a heap of practice games and am pretty much all set, just looking forward to the event now.  I did take a few photos of the desert terrain all set up, it can be seen at the bottom of this page.

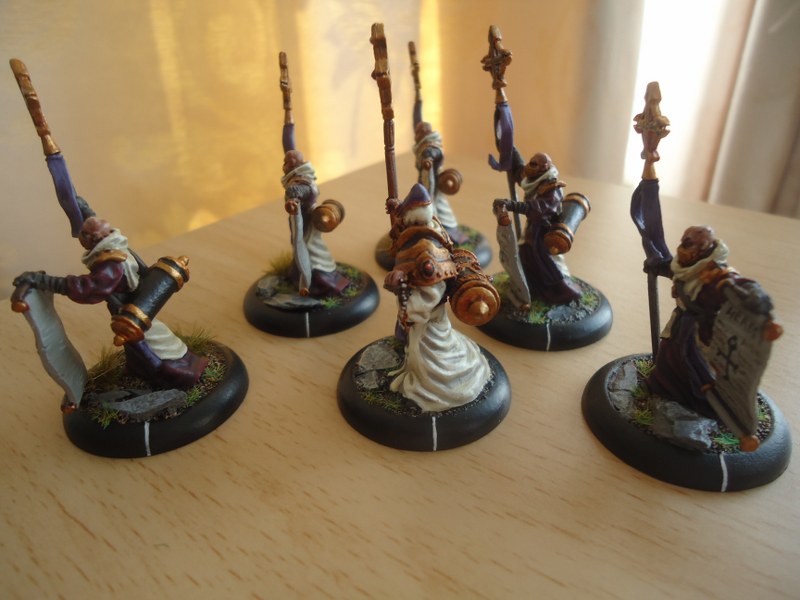
Recently I started work on two additional Choir members to add to the existing minimum unit, bringing it up to a full six members for the afore mentioned 50 point lists.  I simply colour matched the two new choir boys to the colour scheme already established.  Like all my Menoth so far; white, sanguine, gold and purple – painted using the Faction book technique.  The only difference here was the scrolls, each being unique, the two additions were ‘Fire’ and ‘Heresy’.  Below are photos of the whole unit (complete):
Choir of Menoth front
Choir of Menoth right
Choir of Menoth left
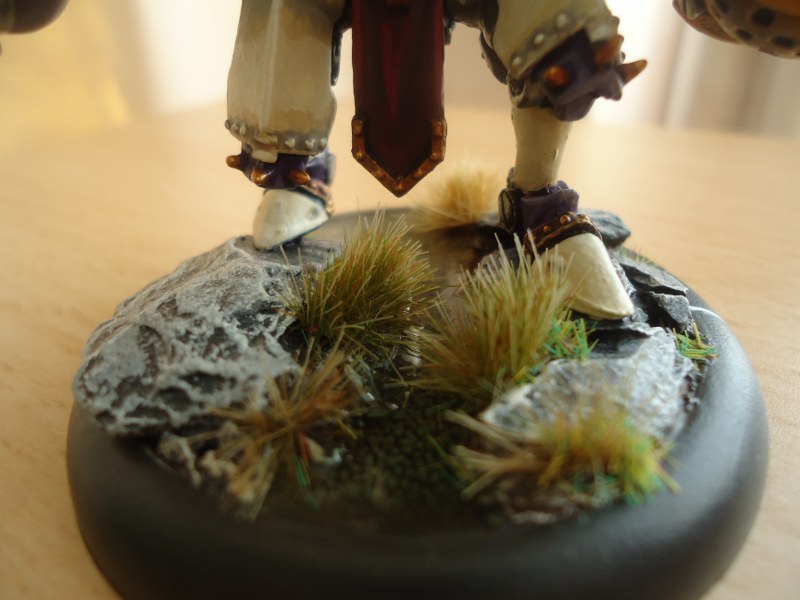
Choir of Menoth rear
I thought I’d continue the tactica idea started in the previous Vassal entry for those who are interested in my thoughts on the Choir.

Tactica Choir of Menoth:
Overall:  The Choir is another warjack support role unit.  They are relatively cheap in cost for what they do, two points for a minimum unit (4 models) and three for a full size unit (6 models).  The Choir has mediocre defensive stats of DEF and ARM 12 meaning if these guys are shot at they’ll likely die.  They have a CMD of 8, though they’ll invariably be able to use the Menoth Warcasters’ CMD value given they’ll not be on the front lines very much.  They have appalling MAT and only a P&S 6 weapon, but the Choir isn’t in the list for its combat prowess, but rather its ability to sing hymns capable of protecting the Menite Warjacks as well as improving them in combat.

Hymns:  These are RNG 3 which is fairly tight when considering Menite warjacks will be surging forwards, luckily the Choir is SPD 6 meaning they can affect a friendly warjack up to 9” away.  One good tip is to measure the reach range of the choir member, as you can do this anytime during the units activation, should you be unsure if it is in range to use the hymn; you might well be able to judge 1” proximity better than 3” when it is touch and go.  It should be noted that all Choir members must sing the same hymn and a wajack may only be affected once, even if you have multiple Choir units.

Hymn of Battle:  Simple really, +2 to attack and damage rolls for one turn.  This can make a pillow fisted jack hit above its weight category, not to mention the accuracy increase.  This hymn will almost always allow you to buy extra attacks as opposed to spending focus boosting to hit, obviously against high DEF targets you’d still need to boost, but low DEF stuff can be hit reliably by a Battle sung Menite warjack.  It should be noted too that this hymn only lasts for one turn, so it has expired by your opponents turn, so it won’t work with free strikes etc.

Hymn of Passage:  The warjack can’t be targeted by non-magical ranged attacks for one round.  This does work in your opponents turn as it lasts a ‘round’.  Great when facing lots of guns that mean to blow holes in your warjacks.  Often enemy guns have cheeky special effects such as critical slamming, knock downs etc that will reduce effectiveness, so this hymn can allow you to advance unscathed.  Beware however of enemy abilities that grant magical shooting as well as a range of magical guns out there as these will by-pass the defensive hymn.  Also be aware that whilst the warjack can’t be targeted, something next to it may well be and could catch the jack in an AoE or spray etc.

Hymn of Shielding:  The target friendly warjack can’t be targeted by enemy spells for one round.  Similarly to Hymn of Passage, it is defensive in nature preventing enemy spells affecting it.  Again any spells with an AoE can still scatter on to shielded warjacks, they just can’t be targeted so placement and awareness of enemy spells and abilities is paramount.

Closing thoughts:  The Choir is a staple unit for any Menite force fielding warjacks, so that’s virtually every list.  Usually a minimum sized unit will suffice, but if running four plus warjacks then a max unit, or possibly a second min unit is efficient.  The enemy will pick off the Choir at any given time, thus reducing the effectiveness of the warjacks, but they’re only a cheap unit and will be hiding at the back of the field where they are more protected one would hope!

I would recommend starting out with the defensive hymns as the jacks approach, which one really depends on what the enemy army has as the greatest threat, be mindful of the short 3" range and avoid running the jacks out of the Choir's range.  Once the jacks can engage use Battle to hit really hard, unless the defensive hymns are really important.  I use the Choir members not using their special actions to form an intervening model for my warcaster quite often, it reduces assassination vectors, though not something to rely upon of course.  I have recently sent the Choir into melee and with some (well a lot) of luck they have killed some enemy infantry, often in the late game you might consider charging them in.  No joke but I killed a Kayazy Assassin, one of Boomhowlers troll men and a couple of Dawnguard Sentinels – Go Choir boys!

Thursday 27 October 2011

Vassal of Menoth


I have decided to paint up a few more support pieces to build my prime and epic Severius lists up to 50 points, the first of which was a second Vassal.  Below are a few snaps of the finished Vassal as well as the original, it is painted almost identically to the other one, though I changed the hair and shoulder guard colours to differentiate them a little (latest one is has white shoulder guards).

Vassal left
Vassal front
Vassal right
Vassal rear
I thought I’d add a small tactical section on this solo, mainly on how I play this support piece and why I value it so much.

Tactica Vassal of Menoth:
Overall:  The Vassal has average defensive stats, DEF and ARM 13 and five boxes of damage so it is relatively easy to pick off should it be placed in harms way.  The Vassal has the Iron Sentinel advantage, which grants it +2 ARM and DEF, as well as can not be knocked down, when in B2B with a warjack.  This mitigates its average defensive stats and allows the Vassal to progress up field relatively safely, any focused attempt will however still kill it, but the odd cheeky hand cannon shot will find it difficult.  The obvious threat is blast damage when the low DEF jack is hit and the B2B Vassal caught, again Iron Sentinel plus five damage boxes will help, but the enemy may boost this damage if it gets the chance.  The Vassal has speed 5 and its special actions are both RNG 5”, meaning it can keep up with the jacks it supports.  Its MAT and RAT are irrelevant as it has no usable weapons!

Arcane Bolt:  The Vassal has Magic Ability [7], so will hit DEF 14 on average, to be honest this ability is seldom used, but best to remember it as it could help in a pinch.

Ancillary Attack:  One of the two reasons to take the Vassal.  It grants a warjack an immediate out of activation melee or ranged attack.  It could be used before the jack activates, say to clear an intervening model prior to activating (freeing up a charge lane for example) or an extra melee attack after the jack has pounded an enemy and you need to hit it one more time.  Ranged attacks are also permitted, so a Vanquisher could lay down two 4” AoE’s.  It should be noted that the Vassal makes the warjack’s Ancillary Attack out of activation so it can’t pay to boost attack or damage rolls, nor could it benefit from sacrificing its movement to gain the aiming bonus for example.  It does however benefit from the Hymn of Battle and other spells etc that buff its accuracy and damage.

Enliven:  The second great special action the Vassal grants.  This time the target friendly faction warjack can make a full advance ignoring free strikes the next time it suffers damage.  This ability can be great for re-positioning your jack out of harms way when it would almost certainly be destroyed from a fully loaded enemy jack on the charge.  It can simply move out of the attacking models melee range and thus end the melee.  The extra movement that Enliven grants might allow the jack enough distance to charge on its following turn, or get a new angle of attack for example.  This movement is very powerful in the Hordes and Warmachine game and can catch unwary opponents out.  On the other hand canny opponents who know how the Vassal works will try and counter its effects, it could be as simple as boxing in the Enlivened warjack preventing it disengaging, knocking it down with a headbutt etc (you can’t advance when knocked down) or other cunning tactics – so beware!

Closing thoughts:  I chose to add a second Vassal to my lists as it brings so many options to the table and as my usual opponents try and target the Vassal early; a second can fill in for the loss of the first as well as being able to affect two jacks per turn with special actions.  I think the Vassal has earned such a reputation as a valuable support piece, my friends consider it a moral victory if it dies during the game, regardless of the overall outcome!!!

Friday 21 October 2011

Super-secret side project… REVEALED! Part II

I completed the first part of my desert terrain project a couple of weeks ago and last night applied the finishing touches to Part II.  Again I’ll provide some detail on how I made each piece for any readers wishing to follow my example.

Rocky outcrops and spires
Large Rock spire - constructed
Firstly I used cork board to mark out the rock formation areas, this provided a starting block and would help to tie in the various aspects of the outcrops and provide some height.


Small Rock spires - constructed
 I then used a bread knife to carve 1” thick blue high density styrofoam (insulation board).  I never use the lighter white polystyrene used as packaging as it is bloody awful to use and it gives a poor finish; also if you have a partner you won’t be in good books with all the mess it creates!  I used a hobby scalpel to do any fine carving once the main shape was created. 


Small rock spires - filler applied
Large rock spire - filler applied
As seen the styrofoam was cut into rough circles and carved at the mid point to make a double ridge.  A 1” thick ridge would be out of scale I felt.


Outcrop 1 - filler applied
Outcrop 2 - filler applied
The styrofoam was filed, then a layer of filler applied to soften the edges and blend in any areas that were still a bit rough, then filed smooth.  


Rock spires ready for painting
Outcrops spires ready for painting


Various grades of gravel were added to the outcrops to keep them model friendly and also look a bit better on the finished item.


Similarly to the terrain in Part I a layer of watered down PVA was painted on to seal the filler and sand, preventing any loose material coming off in the heavy drybrush painting that would be applied later.

Sand dunes
Sand dunes - at filler applied stage
The sand dunes were very simple, literally a large piece of high density styrofoam glued to the baseboard, then carved to shape with the bread knife.  Similarly to the rock spires and outcrops filler and sand was applied.  I did try and take extra care sculpting the dunes to create the crescent shape seen in real deserts, though I had to be mindful this was wargames terrain and as such had to be usable too. 


Oasis
Again a very simple technique; I used off-cuts of the styrofoam to build relief around when the water area would be and smooth the transition with filler.  The photo to the left shows the oasis in its most basic shape, I added lots of smaller off-cuts to ease the burdone of the more expensive filler. 

 Once the filler had dried I re-carved the  contour with the bread knife to get a more appealing gentle slope, the filler was re-applied at this point to further enhance the oasis' shape.


I did add a lot of slate and gravels to the fringes of the oasis to make it a bit more interesting.  The photo to the left shows it ready for painting.

 Painting was identical to Part I, however the spires and outcrops were differentiated by painting them Scorched Brown, then drybrushing Beastial Brown, then Bubonic Brown and finally Bleached Bone.

I finished off the terrain by applying some Army Painter tufts as well as some static grass sparingly.


Finished desert terrain Part II: 
Rock spires
Oasis
Sand dune
Rocky Outcrop 1
Rocky Outcrop2


Friday 14 October 2011

Vanquisher complete

I've spent the last few free evenings productively and finished the Vanquisher.  The Crusader components that fit with this magnetised kit are not done however, but will be done at some point no doubt.  As the kit was magnetised I found it quite easy to get into all of the nooks and crannies of the model, some of which can get missed when  fully assembled miniatures are painted.

Vanquisher legs and base
Continuing on from the last blog entry, the photo to the left shows the finished legs and base.  I used quite a bit of water effect on this base with a small stream or puddle running through the base.  I mounted the Vanquisher on the rocks flanking the water to add to the dynamics.  I found that the Army Painter tufts work nicely with watery bases, enhancing the diorama.


 The following photos show the Vanquisher through 360 degrees, click for larger image:

Vanquisher front-right
Vanquisher front
Vanquisher left
Vanquisher rear
Finishing the Vanquisher was the final step for the Golden Troll event, so the next thing will be to finish part two of the desert terrain project.  Following that I'm unsure what to paint next, I am considering the Holy Zealots or more Exemplar Errants for units, maybe the Harbinger or eFeora for casters, possibly the second Vassal or eEiryss for solos.  It might be an idea to upgrade my Sevvy lists to 50 points and paint those bits - who knows!

Monday 10 October 2011

Gaming and painting update

Vanquisher painting update
I’ve started the Vanquisher now and decided to match the purple/cream/gold panels to the existing Crusader jack for continuity.  The painted Crusader is the battlebox jack and was glued as a Crusader.  I purchased two plastic Menoth jacks later and magnetised them so I can make several variants, the Vanquisher being used this instance.

Vanquisher legs WIP
I paint the bases of my models first these days, I used to do the base last but find a better result when I can drybrush the base without the worry of ruining the paint job on the actual model.  I also put a lot more effort into my bases these days and find they look better when painted first!  One thing I do however is apply the static grass and tufts after the model is finished so if by chance I did allow the base to get some unwanted paint on it the grass/tufts could be placed strategically to hide this!!


Vanquisher legs WIP
Work in progress shot of the Vanquisher’s legs below shows the main base coats applied, followed by the first shading layer.  The next step is to re-apply the base coat, this will effectively give the model its first highlight and stop it looking totally flat.  After that I’ll apply proper highlights and in some instances deepen the shades creating the usual transition.  I’ll paint the legs in one stage, the body and head in another, followed by the weapons.

 Gaming update
Well I’ve discussed a lot about the painting of my Meonth in preparation for Golden Troll in a couple of weeks, but less on the gaming side of it.  I’ve primarily been using the Prime Severius list as this one has changed the most, the Epic Severius one being tournament tested needed less practice I felt.  For reference the list is:

pSeverius
*Blessing of Vengeance
*Vanquisher
Avatar of Menoth
Choir of Menoth (min)
Temple Flame Guard (min)
Exemplar Errants (min)
Exemplar Errants UA
Vassal of Menoth

The big change, previously mentioned, for play testing was dropping the TFG to a minimum unit and upgrading the Crusader to the Vanquisher.  In essence this change was for the better.  My play testing of late has allowed me to get the Vanquisher working well and its continuous fire 4”AOE just works a treat, I've incinerated infantry as well as caught a few unwary Warcasters with the fire - it also serves well to make opponents react to it.

I’ve found that the minimum TFG feels a lot slimmer than its full size, that sounds obvious, but when the unit is designed to form a defensive cordon for Sevvy or as a tar pit unit, loosing 40% makes it much less effective.  Through my play testing I found another use for the TFG, I’ve been cheekily slinging one of them forwards into a position where I can blast it with Ashes to Ashes through the Blessing of Vengeance, the spell hits the D6 nearest enemy, so although I’ll loose my TFG I can potentially kill 1-6 high defence low armour enemies in combat with my troops, stealthed or hiding behind cover etc, effectively needing a 3 to hit.  For larger games I'd definitely upgrade them back to a full size unit for two points.

Gaming has gone fairly well and I’ve won more practice games than I have lost, a good thing for me – LOL!  I think I’ll probably use the prime list more than the epic, though at the tournament you must use each list at least once, either way I’ll have some fun which is why I’m going after all!

I’ll post some more pics as the Vanquisher gets its paint job, then I’ll concentrate on the second phase of the desert terrain, so watch this space!

Friday 7 October 2011

Super-secret side project… REVEALED! Part I

I quite like making wargames terrain; I used to build it a lot when I worked for GW as well as my own personal collection.  Recently I had an idea of creating some new terrain and fancied making a desert themed board and terrain.

The Desert; source

Maybe I was granted a vision by Menoth, who knows?  I have been using both prime and epic Severius after-all…

"We knew the land so close to the Bloodstone Marshes was bitter and hot, but as Hierarch Sulon once said, hardship is the coin of Urcrean. Menoth would be proud of his children should they survive in such a place".   Prime II, p125.

The following details part 1 of my desert themed terrain.  Its quite detailed as I wanted to explain exactly how I built it so thanks for reading in advance!

Ideas and concept
The first order of the day was to sketch out some ideas, I drew some sand dunes, which would count as hills, the crescent shapes would be challenging from a modelling point of view, but look great on the field.  I thought of rocky out crops, these would be difficult ground, but maybe not block LOS.  A rock spire would look iconic (see Star Wars epIII on Tatooine as Anikin storms through the desert on his speeder), this would be a simple impassable object.  I liked the idea of palm tree clusters counting as woods and maybe an oasis for a shallow water feature.

Research
With the ideas I had gathered so far I researched ‘desert terrain’ in Google, found a few interesting modelling sites as well as imagery of real world deserts for inspiration.  I did have a few issues with this terrain project, the main one being the palm trees, there are some interesting ones at Warhammer World and I think they’re made with Christmas tree branches and a few other household bits, not that easy to build or able to get to look good, plus I’d be in bother in a few months when the Christmas tree was obviously missing a branch or two. ;-)  Instead I found this site selling plastic palm trees and like a golden nugget some plastic cacti too!!

Base boards ready for cutting
Stage 1 - Baseboards
I marked out terrain bases on hardboard sheet, I actually made a paper template for the crescent sand dunes.  Photo (left) shows this; highly exciting stuff!  Then I used a jigsaw to cut them out, finally I used a sanding tool attachment on a Dremel to bevel the edges.


Plastic palm tree components
Stage 2 - Palm trees
The Pegasus Palm trees come in five bright green plastic fronds and a turd coloured brown for the trunk and base!  


I just sprayed the plastic with black primer and painted the fronds and trunk with acrylic paint.  The fronds were painted with Dark Angels Green, then drybrushed with Goblin Green and  Bilious Green.
The trunks were drybrushed with Khemeri Brown, then Deneb Stone.

A top tip for this kind of thing is to file off any paint where the plastic has to be glued, mainly because it becomes too tight a fit due to the paint and also if using plastic glue it tends not to create such a strong bond if paint is present.


Stage 3 – drop terrain bases
The tree bases and cactus bases were built together.  The palm trees had coins attached to the bases in order to weight them given the height and top heavy nature of the palm tree style.


Cork tile was used on the cactus drop terrain to create height, the edges bevelled with a hobby knife.  I cut down dome of the cactus’ plastic bases as they were a bit big or overhung the cork in places, but for the most part they were fine.


After this I applied some Polyfiller over the whole thing to marry in the bases and get rid of any imperfections – this was filed when dry to further ease transition.  Prior to the filler drying I inserted some larger stones in select places, they’d just look a bit better when slightly sunk in I felt.


Once the filler had dried and been tidied up I added a layer of sand and gravel, I like to apply a watered down layer of PVA once it has dried fully as this seals it from the top, it really bugs me whilst drybrushing a bit of gravel flies off revealing the bare unpainted sand beneath, the sealing layer of PVA reduces the chances of this I find.  The final step was to undercoat the pieces in black primer.
Stage 4 Painting
Once the drop terrain was modelled I proceeded with the painting.  I purchased a litre of desert looking paint from B&Q, I took a pot of Desert Yellow Citadel paint to the store and got a colour match.  I painted two 4'x4' MDF gaming boards using a decorating roller, that was why I needed a litre.  I painted each gaming board twice to have a strong even coat.  I had considered modelling the gaming boards, or at least texturing them with a view to drybrushing them, but opted for the simple option.  I may change my mind at a later date, but flat colour boards are fine at this time.

I used the same Desert Yellow emulsion to base coat the drop terrain, then drybrushed the sandy texture with Bleached Bone to add a highlight.  The rocks were painted grey to add a bit of variation and the cacti base coated with Knarloc Green.  I realised the cacti were two different species of plant and through my research realised one was more of a bluey green, these were drybrushed with a mix of Vile Green and Ultramarine Blue, the other species received a drybrush of Bilious Green.  Both species of cacti were then washed with Thraka Green  in order to bring their colour closer together.

After the painting was done I added a couple of snakes from the Lizardmen Warhammer range as well as some 6mm Highland Tufts from the Army Painter Battlefields range.  See below for the final results:

Palm tree base
A brace of Reckoners wander through the desert!
Errants manoeuvre through the desert flora!

Hope they've got their UA...
Oops, no UA, then no pathfinder... hope that cobra is domesticated...

Thanks for reading :-)
Part II will have the remaining terrain features: oasis, dunes and rock spire.

Thursday 6 October 2011

Super-secret side project…

I’ve still got the Vanquisher jack to complete for Golden Troll at the end of the month, but haven’t made any progress with that yet, other than a bolt gun metal drybrush...

The reason for my tardiness is, as the title suggests, that I have embarked upon a small side project.  This is top secret at the moment and I have enlisted the “help” of a family member as seen below:

Miss Alice "helping" Daddy ;-)


As you can see my help is very cute and says “I like to do the painting Daddy”, clearly following in my footsteps, how could I refuse!

The super secret project will be revealed very soon – watch this space!